Friday, 2 March 2012

One year on...

So Always Have a Plan B has been going a whole year! While my posting has been a tad sporadic it has been due to crafty projects and not a lack of motivation. It has been amazing how much my confidence has grown through showing my wares online and a lot of that is down to everyone who has supported me- so a HUGE thanks to you guys.

I love the fact that friends and family are commissioning things from me- from cushions and presents to wedding invitations and logo design- and I love doing them. While sometimes they might be a rather large stretch for my technical abilities they have been the best learning curves I could have asked for and I hope it continues into 2012 and beyond.

Enough emotional reflection for now. Instead here are some pieces I have been working on for the past few months.

It's not a birthday without bunting
And what better way to celebrate becoming 2 than with some personalised birthday bunting.


Pegs
Yep still not bored of making pegs yet! I think I love making them for 2 reasons. 1) it is perfect for using tiny bits of fabric that I love too much to throw away and 2) it's such fun matching fabric to people. I might not show any more pictures of pegs on the blog but I think I will be making many more...
(sorry the picture isn't so hot)

Pin Boards
I made this pin board for my dear friend's 30th using one of my favourite bits of fabric and made some cute little button pins to match. I used a deeper canvas this time and I like the way it become free-standing this way. 


Wedding Invites
There was something spooky about the timing when I was asked to design Princess Glitter-kitten's wedding invites- it was almost like she knew I had just started an Adobe Illustrator course... I am really pleased  with the way they came out and can't wait for the Glitter-kitten nuptials in April. Here is a picture of the front- using my favourite LoveLetter typewriter font.

I wanted to find something spring-like but not too clichéd. I started off my searching through my photographs of images I'd taken in April and struck gold in the first album. This photograph was taken on the first camping trip of the season a few years ago- I can remember the moment so vividly and it is full of happiness- Slim and I had set up a hammock by a lake and were soaking up that amazing warmth you get with early spring days. In my mind this made it the perfect image to use for what will be another extremely happy and memorable day.


So what's next? Ange from Remedy has asked me to a design a logo for something she is setting up. Logo design something I have never done before but having just finished my course, in which logo design was covered, I feel ready for the challenge. Some spice jars have been requested and am I currently eating my way through pickles to get enough matching jars. I also have some cushions to make for my cousin Helen and friend Vicky after Helen dreamt that I said I would be delighted to make them... sneeky! The Brighton Bakers also have a a commission in the pipeline for some cushions for their recently decorated bedroom which sadly will involve some fabric shopping- what a drag! And I hope to start a patchwork project for Slim and I.  Busy Busy!

Thanks for reading and I hope you'll stick around for another year of crafty makes. Happy start of spring! x

Spring on campus


Thursday, 5 January 2012

2012- a craft odyssey

Happy New Year! I hope the start of 2012 has been good for you so far.

I started my 2012 craft  list last night and it looks like I'm going to be pretty busy. Still, what could be better than a crafty hibernation period until the sun comes out! Feeling really excited to start some new projects, like my friends wedding invitations, a patchwork quilt project and starting an Adobe Illustrator course, but before I start on them, here is a round up of my Christmas makes.

COASTERS


 Yep. More appliquéd coasters! But they're such fun to make.

PEGS
I have been meaning to do some fabric covered pegs for yonks and I'm so pleased I did. I'm really chuffed with how they turned out and it is such a great way to use scraps of fabric. AND they were easy to do! All you need are some plain old wooden pegs, some card, fabric scraps and lots of glue.

Fabric Covered Pegs Instructions:
1. I measured the front of my peg and cut out a bit of card just a teeny bit smaller.
2. Then cut the fabric scrap so that will wrap around the cardboard- I had about 5mm extra round the edge.
3. Cover the bit of card with glue- I just used PVA but if I had any spray mount I would have used that- stick the fabric to it, wait for it to dry.
4. I trimmed the corners from the fabric so that it would wrap around the card neatly and lie flat and then glued the edges and waited for them to dry.
5. The last step is to glue the fabric covered card to the peg. Again I used PVA for this. Simples.


FABRIC COVERED NOTEBOOKS


I also made some more of  fabric covered notebooks to go with the pegs using the same method as I did here.

SPICE JARS 
I am really pleased with how these spice jars turned out- not complicated to make at all but I think they look quite classy. I painted the lids with some emulsion paint I had in the cupboard (yep- teal tension again), drew a designy-thing in black permanent pen around the edge and then painted a layer of PVA over it to give it some shine and protection. The labels are just ripped from brown paper and stuck on with PVA. Very much looking forward to eating some of the dishes Slim will make using them...


BUNTING
Slim's niece isn't quite old enough for super fun toys yet so I thought I would make her a keepsake for her first Christmas. Hopefully this celebratory Eleanor bunting will be something she will keep for years to come. And to make it extra special I have used material from her mum's maternity dress and her grandma's sewing box.


CUSHIONS
This last make was for my friend's birthday and it just wouldn't be a blog post from if it didn't feature at least one cushion. This one that has a pretty good story to go with it though. My dear friend Mazz's mum was given the fabric by her uncle who was in Malawi on a GCHQ mission in the 70's. Then when she moved house she found it and very, VERY kindly donated it to me knowing how much I would love the colours and patterns. It is truly stunning fabric and I have lots of other ideas planned for it.

I really love making things have that an interesting story, heritage, history or link  to them so if you have anything that you would like to turn into a keepsake or memento get in touch and I would love to work with you on it.

So that's Christmas all wrapped up for another and the countdown to spring can begin. Yippee x


Monday, 19 December 2011

It's been a long time, been a long time, been a long lonely, lonely, lonely, lonely, lonely time.

Yes, it has! I am not in the habit of quoting The Zep but as I started to type this blog, 'Rock and Roll' came on the radio and it felt more than just a coincidence.

Just wanted to check in really to remind myself that I had a craft blog and shop that needs some attention...but I have good excuses! I have been crafting up a Christmas-storm of late- not for sale in the Folksy/Etsy shops- but for my nearest and dearest. As there are still 6 DAYS to go until the magical unwrapping day I can't share my makes just yet but here are some pieces I recently made which inspired the Christmas gifts.


I started working on this piece of appliqué on my first visit to the stitch n bitch club at work (think I might have set the bar a bit high now) and I used some of the techniques I learnt on the Make Lounge course. The background fabric is a piece of 60s kimono fabric and I used a dark blue felt for the bird. Once completed I turned it into a Happy New House card for our new Brighton Neighbours.They're still in Brighton so I guess they liked it!

Sticking to the kimono theme, I used another piece to make a coaster for my new lunch buddy. Cat is more than a little obsessed with purple so this fabric was just too perfect not to make her something from.


Last year I  managed to design and sell Christmas cards to raise money for Huntingdon's Disease. I was hoping to do the same this year but somehow I just ran out of time. Better make sure I am a bit more organised next year! Just to share with you here are the 5 designs I sold last year:


I hope you have managed to have some fun with the run up to Christmas- it just seems so easy to get caught up in the mayhem and forget that it's supposed to be fun! I look forward to sharing my Christmas makes with you next year. Till then a very Merry Christmas and a Happy New Year! x

Monday, 24 October 2011

Have beautifully handmade journal, will travel

In a slightly hungover state last Sunday I pretended that my staring into space from the sofa was in fact me planning a crafty project for my dear friend Hazel's 30th/ going off travelling gift. It wasn't by the way. 

I knew I wanted to make her a travel journal to take on her year long adventure but as I am not a book binder was wasn't sure how to go about it. Would I staple or glue or sew? How many pages? Do I buy a notebook and decorate it? Do I just buy a nice notebook?

So with four evenings left to come up with a solution I stumbled on this sketch book tutorial by Susie Ghahremani of boygirlparty just in the nick of time. That night was spray-mount-tastic.

Fabric-covered Handmade Journal Tutorial


I am afraid I don't have step-by-step photo instructions as I was covered in spray mount. Susie does an excellent job though and I will describe in good old fashioned words the changes I made to my project.

Step 1:
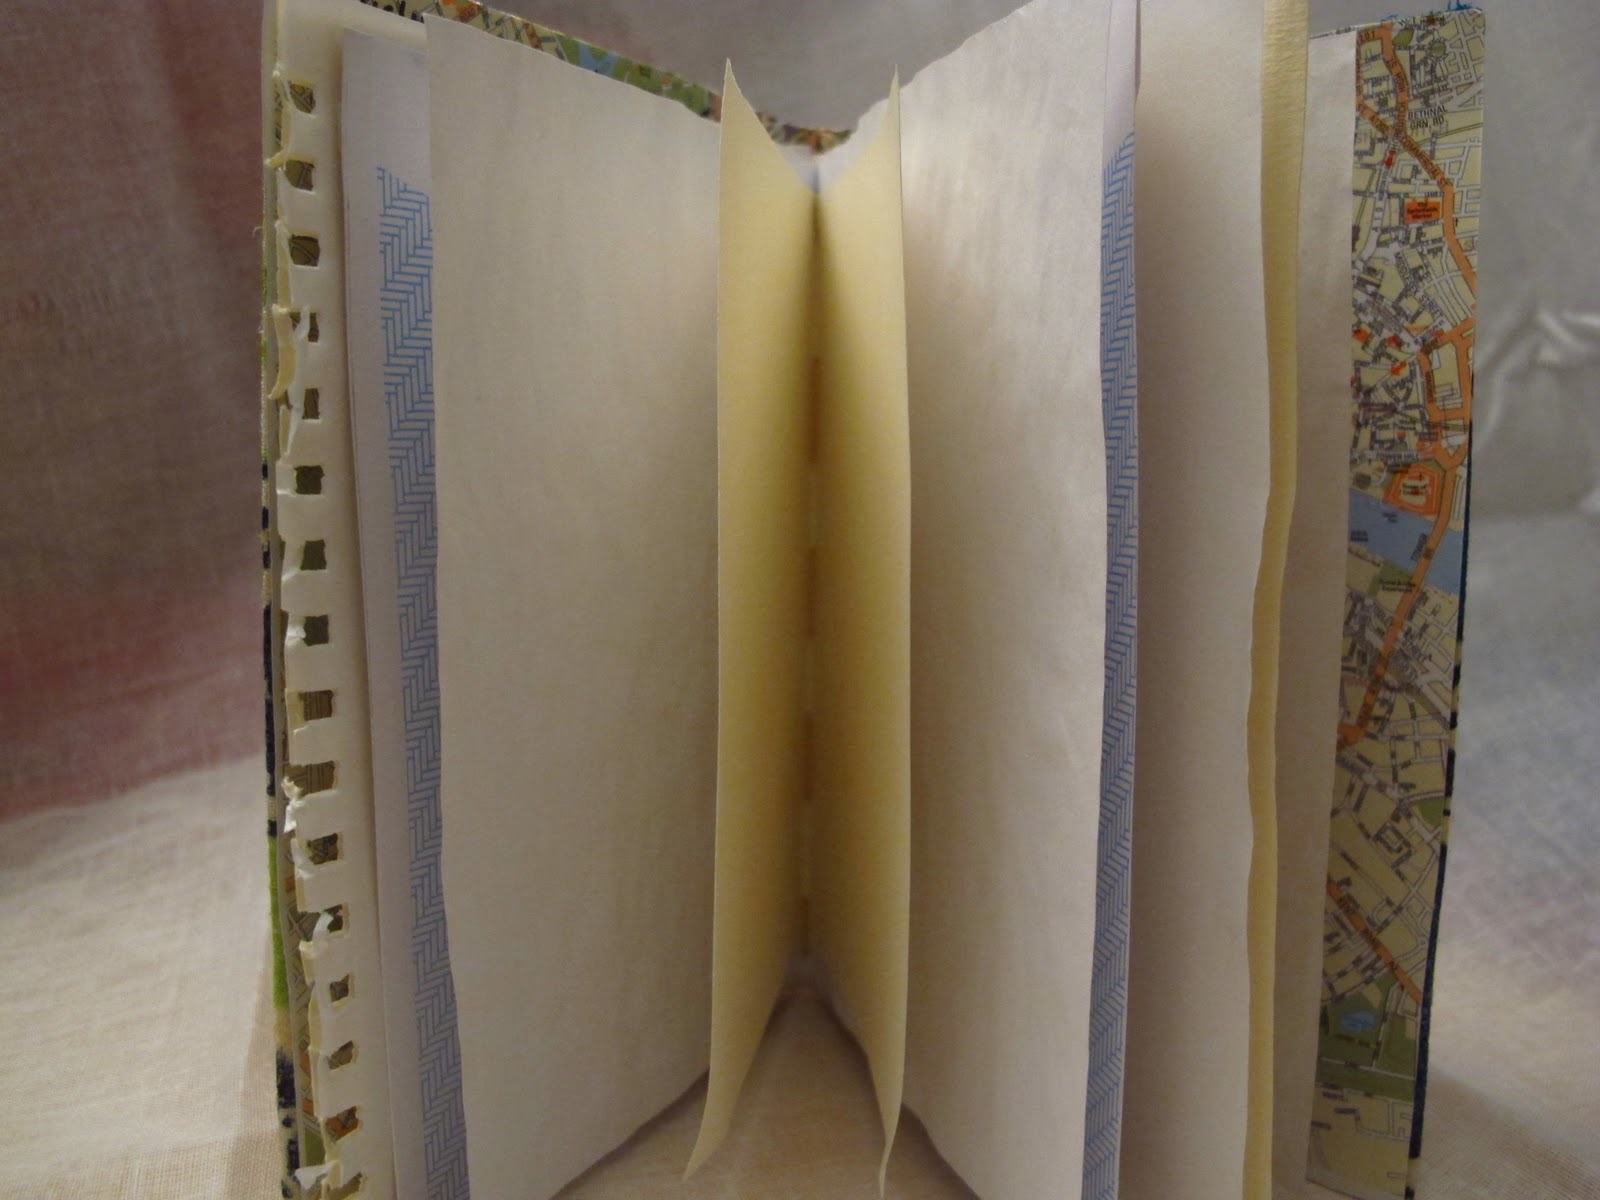
Inspired by my library bear notebook from previous posts I decided to use different types of paper in the journal. It is roughly A6 in size and I used approx 9 bits of A5 paper, folded in half. The paper I used ranged from an old envelope with a pretty blue security pattern to green notepaper given to me by Hazel about 12 years ago.

I then tried to put it through the sewing machine. Not such a good idea.

Step 2:
A bit stumped I moved onto the front cover. I decided to use fabric covered cardboard for my cover so that it would survive a rucksack a bit better. I love this West African fabric. I am going to make a skirt from it soon but I couldn't resist making a little project from it any longer. 

From an old cereal box I cut a piece slightly bigger than A5 and folded it in half. I then cut my fabric with about an inch border all the way round and made sure I lined the pattern up with the crease (the back is a different colour as you will see...)

Step 3:
Next spray mount one side of the cardboard and tightly stick the fabric to it. Then spray mount the other side- round the edges and neatly fold over the rest of the fabric as tight as possible but allowing for the fold in the middle. This is a bit messy.  

Make sure you don't touch the two sides together...just saying.

Step 4:
BRAINWAVE. I finally worked out how I was going to put the thing together. I cut another piece of paper- this time from a map of London cos that's where she lives for now- just a bit smaller than the inside of the front cover. The plan (B or maybe D) was to sew the pages to this and then stick the map to the inside cover.

I lined the pages up with the map and using just a good old needle and thread, sewed down the fold and securely tied it off at the back. You might want to use a thimble. I do have a dent in my thumb now.

Step 5:
All you have to do now is spray mount inside the front cover and firmly place your sewn together pages to it. Simples.

Step 6:
I wanted to make a band to go round it so you could attach a pen or something. This is just from a bit of elastic I had in the sewing box, but the glorious button is from my grandmother's button box.

Front
Back
Inside cover
Pages
I like the way the torn-out notebook edges stick out a bit
Close up of button detail
So there you have it. One fabric-covered handmade journal.

Thanks again to Susie for your excellent tutorial and to spray mount for making this project possible.
xx


Tuesday, 18 October 2011

All that glitters

Those who were at my birthday BBQ when unicorn burgers were on the menu will know how exciting I find glitter. So when I found these great glitter textures for Photoshop it was a splendid day indeed. Thank you regular jane!


This card was made for my Cousin. The incredible 'Pugcocks' are made my Emily Valentine Bullock. I thoroughly recommend checking her work out. It is amazing.


Mazz's birthday card also featured glitter quite heavily as you can see. The Russian skull dolls embroidery was also made for her (I can let you into that secret now) and I framed it as part of her pressie.


I have also been putting my new found coaster making skills into practice. I made this for my friend Val's birthday. I do not in any way consider my obsession with the camping curtains unhealthy.  


And now that I have been invited to join a stitch'n'bitch club at work I plan to start some more appliqué and embroidery projects soon. Coasters could be in everyone's stockings this year... xx

Thursday, 29 September 2011

The Applique of my Eye


Way back in May my good friend in Aus-land sent me a voucher for The Make Lounge. I ummed and ahhed for ages over which of their fabulous courses to take and eventually picked Machine Embroidery & Applique. I'm so glad I did.

Here are my 3 final pieces that I took home after the evening course. And I have to say I am pretty pleased with how they turned out. The course was set out perfectly- small class size, lots of sewing machines and ironing boards, well paced activities with room for taking your own angle on the tasks and, most importantly, the most glorious selection of fabrics to play with. 

I am so chuffed with my tea cup and I can't believe how perfectly it fits the embroidery hoop I've had stashed away. This has gone straight up on the craft room wall. The cut out technique used here is definitely one I will use again. Here's a close up:


As soon as we sat down I spotted this city scape fabric so I knew I had to use it in some way. 

On the course they suggest that the applique samples could be made into coasters so I have used this fabric to make one for my new office. Just need to finish stitching up the sides and it will be ready to show off at work!


I am not 100% sure what I am going to do with the final piece but I think I might frame it. I really like the way it looks like russian dolls and I even managed to give the middle one a little machine embroidered crown.


What an amazing birthday gift- thank you so much Helen B! I am now so glad I have kept hold of all those little scraps of fabric- I think the heat n bond will be coming out this weekend...

Speaking of Helens and applique- I was able to give my cousin her birthday cushion when she came to visit last weekend and I am pleased to say she liked it.

The background fabric is a lovely, soft herringbone patterned flannel I got on etsy and the flower applique has been cut from Slim's families old camping curtains. Upcycling, recycling and reusing does make me happy.

Front detail
Back
Close up detail on back
I don't know if you can see it on the pictures but the flowers have been outlined in gold thread. It was certainly a labour of love and it's a good thing there were so many episodes of The Sopranos left to watch but I'm really glad I persevered because the detail really makes it special (so says me..) 

That about wraps up my craftiness this week but I have been planning my next set of cushions which have been commissioned by my mum. She has picked some of my favourite fabrics and so I know I will enjoy coming up with some ideas for them. 

Hope you are all enjoying the beautiful sunshine in the UK x